Webhooks allow you to communicate with third-party applications or your own apps and systems by sending HTTP POST requests when specific events occur in Firmhouse. You can view all available webhook events in the developer documentation.Documentation Index
Fetch the complete documentation index at: https://docs.firmhouse.com/llms.txt
Use this file to discover all available pages before exploring further.
Setting up webhooks in Firmhouse
Creating a webhook in Firmhouse is a simple three-step process:- Get the webhook URL from the application you want the data sent to
- Use that URL in the webhook section in Firmhouse
- Set up what events you want your webhook to listen to and notify you about when it occurs
Create a webhook in Firmhouse
Steps
- Navigate to Apps in the sidebar
- Find the Webhooks app and click Configure
- Click New outgoing webhook on the top-right
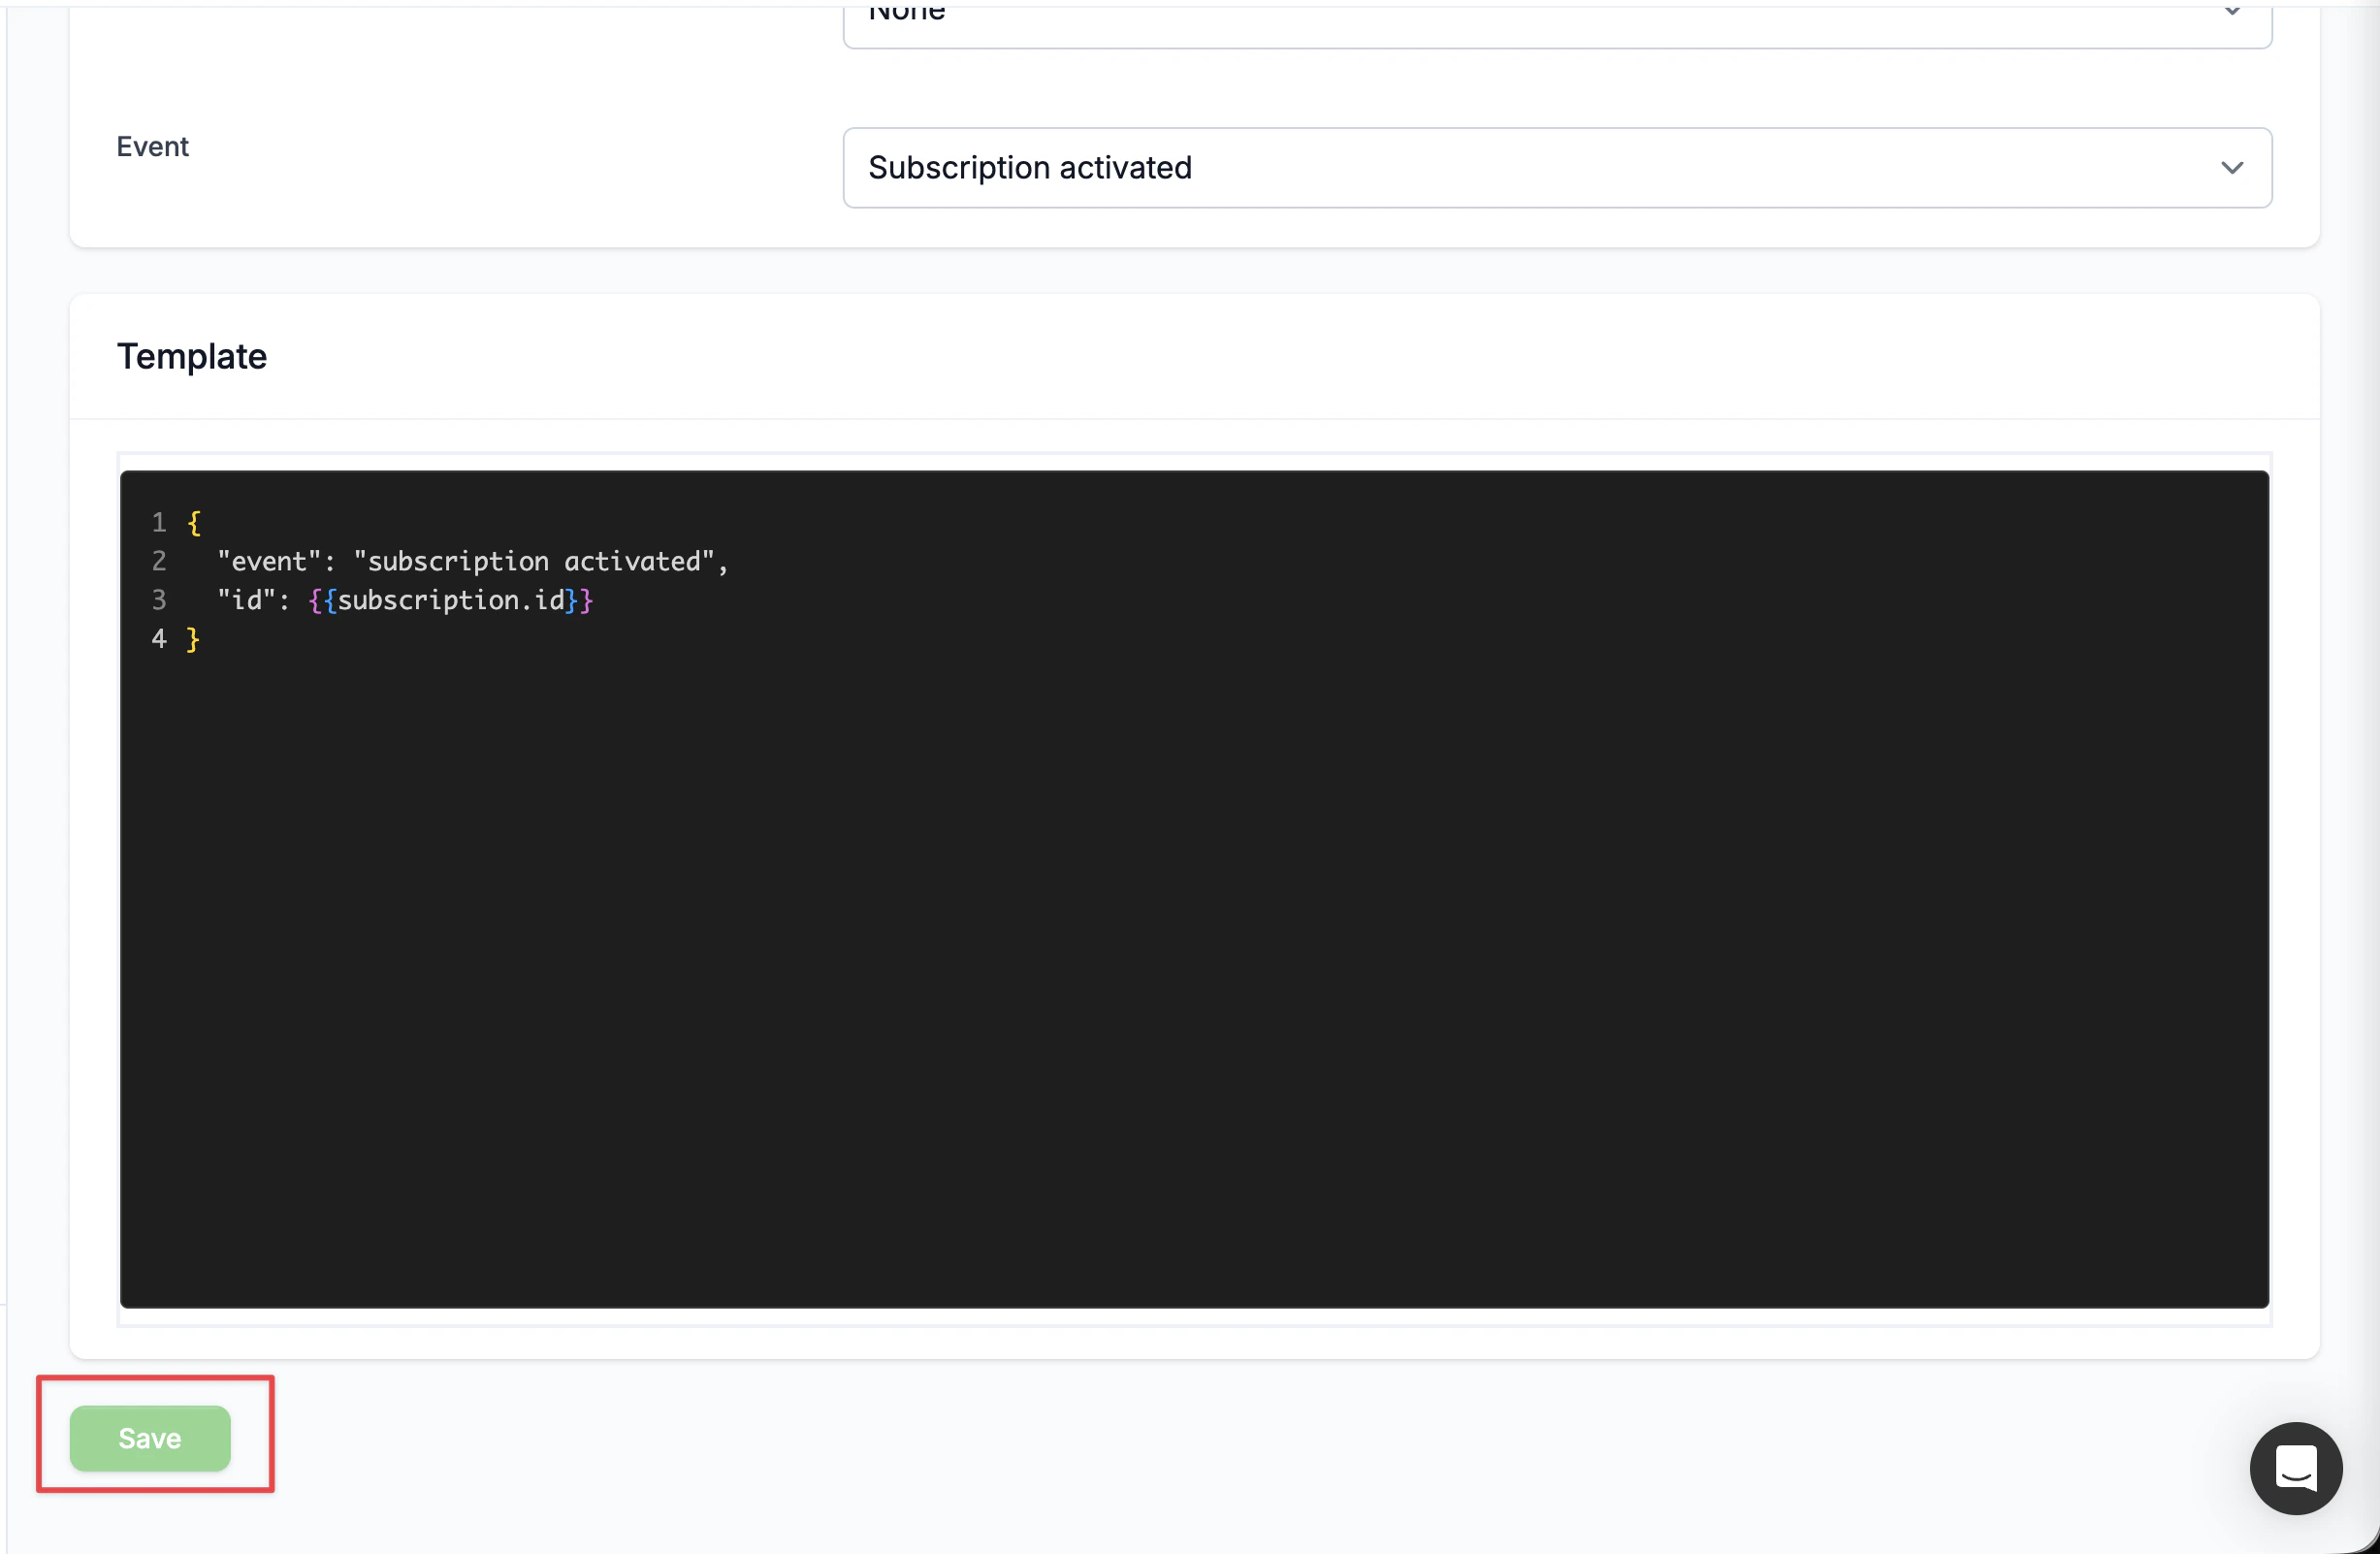
- Enter a Name for the webhook, such as “Activated subscription”
- In the Endpoint url field, enter the URL you want to receive the webhook. This is where the data will be sent once the webhook is triggered. The URL will receive an HTTP POST request when the selected event happens.
- If you intend to use Basic authentication to secure your webhook, provide the Username and Password of the HTTP Basic auth, otherwise leave Authentication type on None
- From the Event dropdown, select the event you want to be notified about (e.g., Subscription activated)
- In the Template field, configure your payload using JSON format and Liquid tags. For example:
Learn more about Liquid tags in Firmhouse in the developer documentation.
- Click Save to save the outgoing webhook
Enable or disable a webhook
You can enable or disable your outgoing webhook temporarily without having to delete the webhook itself or its content.Steps
- Navigate to Apps in the sidebar
- Find the Webhooks app and click Configure to open a list of already saved outgoing webhooks
- Click on the particular webhook you want to enable/disable and click Edit
- To enable or disable the webhook, check or uncheck the Enable checkbox, respectively
- Click Save to save the outgoing webhook
Subscription discount webhook events
If you want to automate discount lifecycle handling for subscriptions, use these events:subscription_discount_applied: sent when a discount is first applied to a completed subscription.subscription_discount_updated: sent when an applied discount changes, including usage updates and deactivation (active = false).subscription_discount_deleted: sent when an applied discount is removed, including Shopify discount removals from the Applied discounts section.
Order scheduled webhook event
Useorder_scheduled to react when an order enters the scheduled state. This is useful when you want to trigger automations, notify external systems, or run follow-up processing in your own application.
Recommended template:
Subscription upcoming billing webhook event
Usesubscription_upcoming_billing when you want to run checks or automations before billing-cycle order generation.
- This event is available only for order-based projects with plan management enabled.
- Firmhouse evaluates eligible subscriptions every night at 01:00.
- You can configure how many days before
subscribed_plan.next_billing_datethis event should fire in the webhook settings (1-5 days, default: 1 day).
Editing a webhook
Firmhouse allows you to edit the configuration of your webhooks.Steps
- Navigate to Apps in the sidebar
- Find the Webhooks app and click Configure to display a list of already saved outgoing webhooks
- Click on the webhook that you want to edit and click on the Edit button
- Make the necessary changes to the configuration fields of the webhook
- Click Save to save the changes
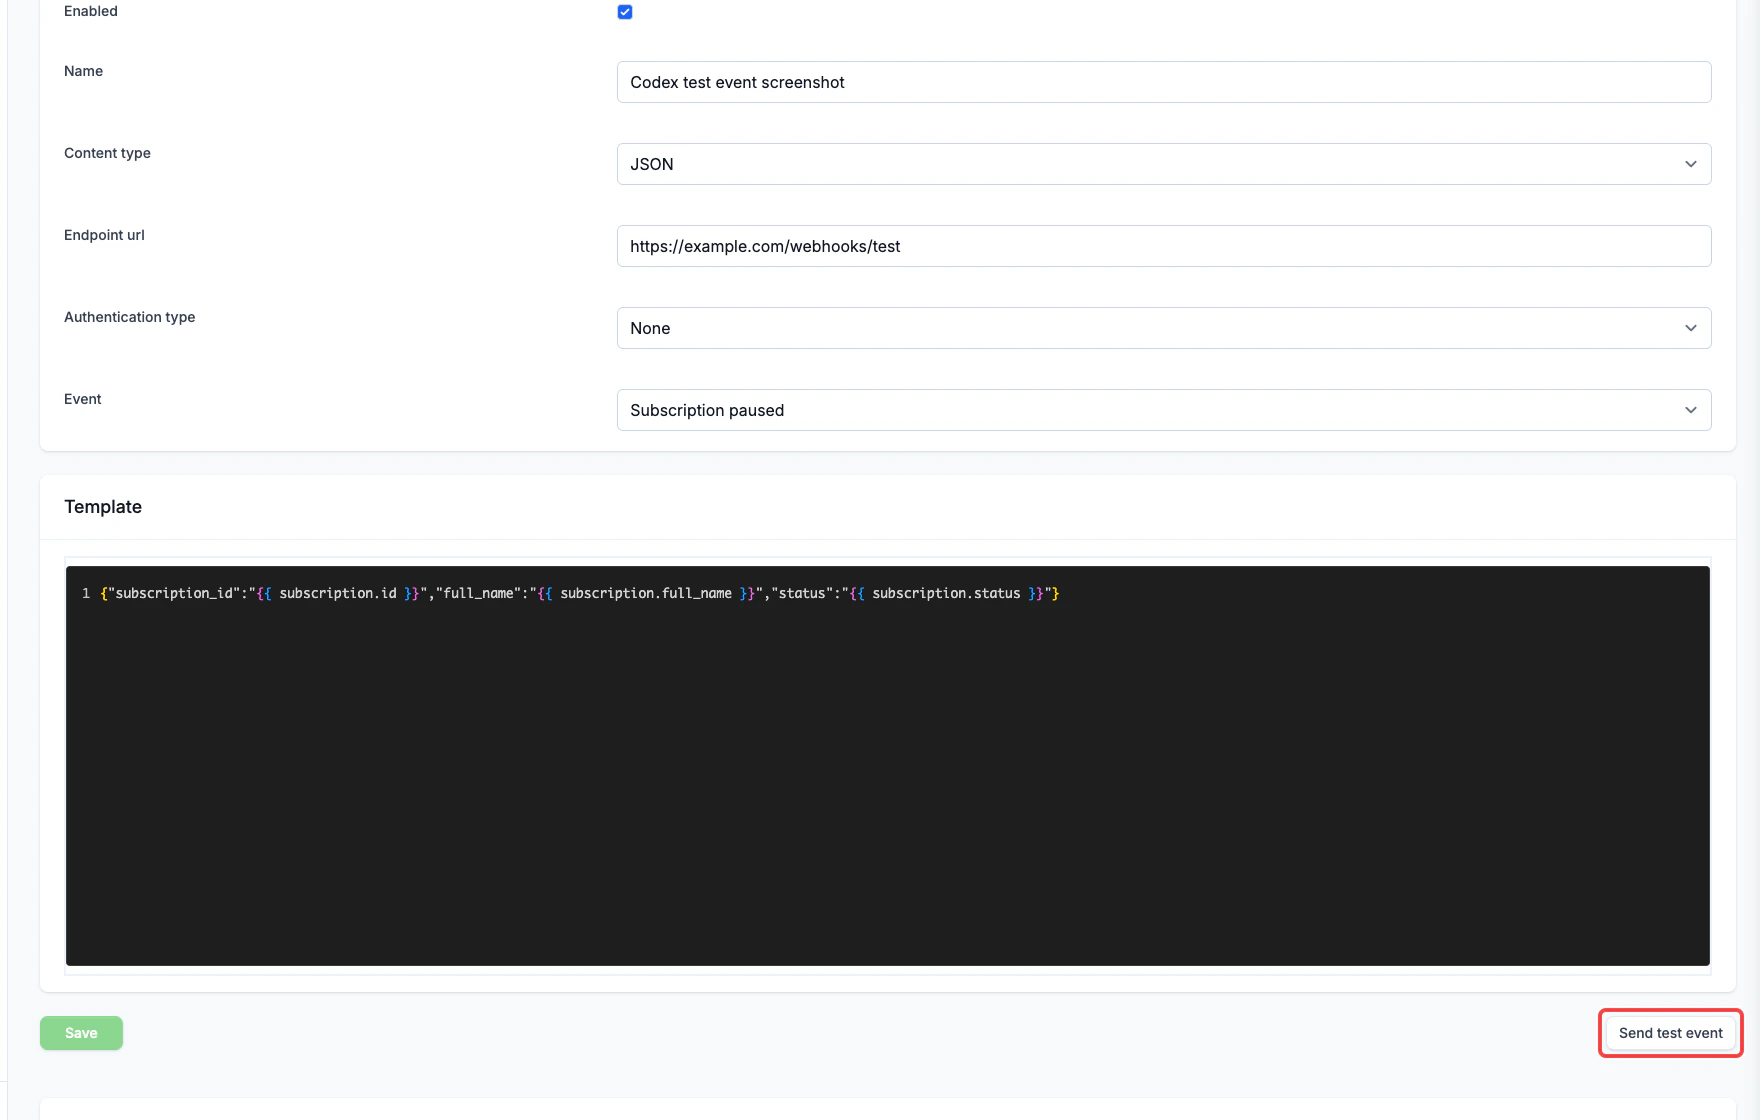
Send a test event
Use Send test event to check a saved outgoing webhook before waiting for a real customer event. This action sends the saved webhook configuration with sample Firmhouse data and records the result in the Webhook event log. If you changed the template, content type, or any other setting on the page, click Save before sending a test event.Enable in New Features
This action is available while Outgoing Webhook Test Events is enabled from New Features.Steps
- Navigate to Apps in the sidebar.
- Find the Webhooks app and click Configure.
- Open an existing outgoing webhook.
- Review or update the webhook template.
- Click Save if you made any changes.
- Click Send test event.
- Check the Webhook event log for the request body, response code, response body, duration, and attempt count.
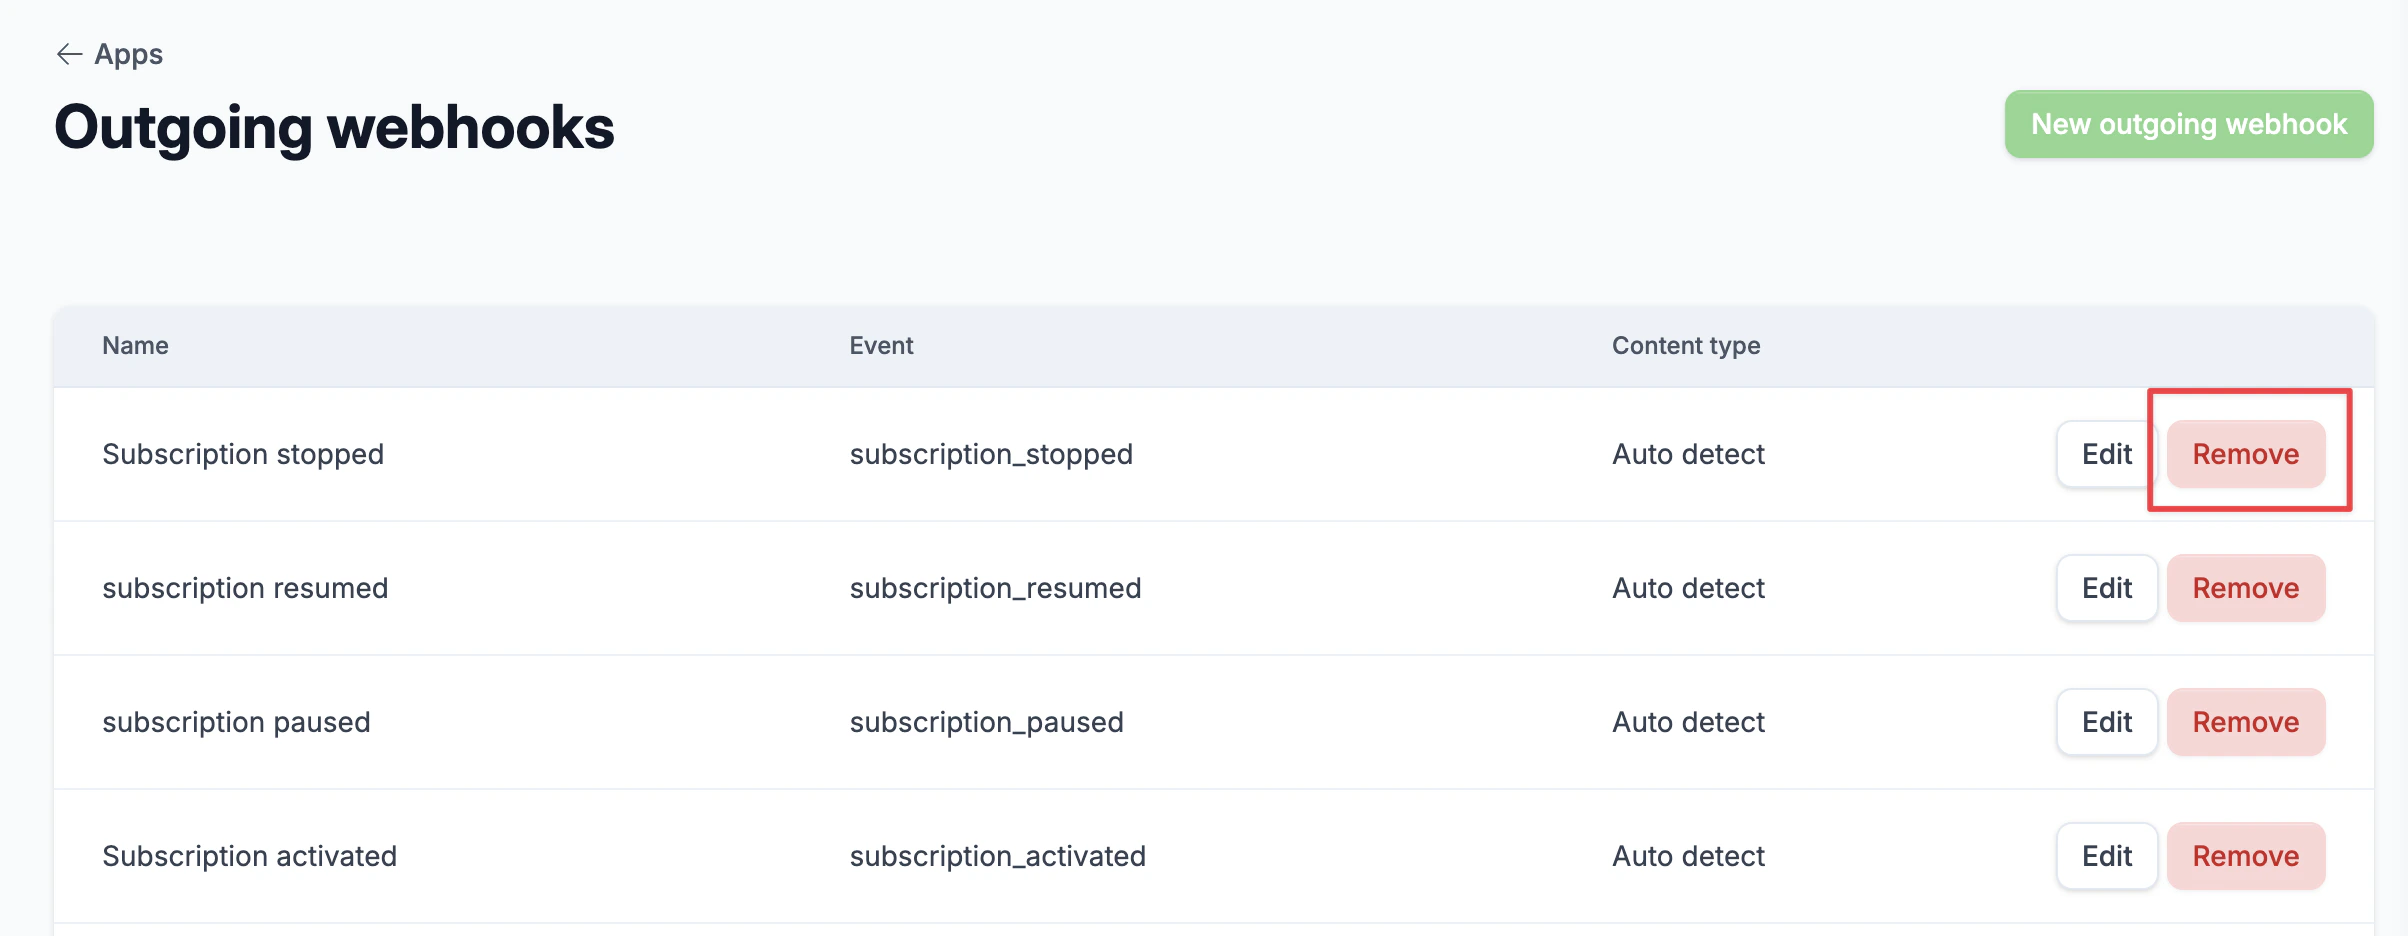
Deleting a webhook
Firmhouse allows you to delete webhooks you no longer need.Steps
- Navigate to Apps in the sidebar
- Find the Webhooks app and click Configure to display a list of already saved outgoing webhooks
- Click on the Remove button on the far right of the webhook that you want to delete
- You will get a prompt “Are you sure you want to remove this outgoing webhook?”, click Ok to confirm the delete action